
DIY Kayak Battery Box 2025
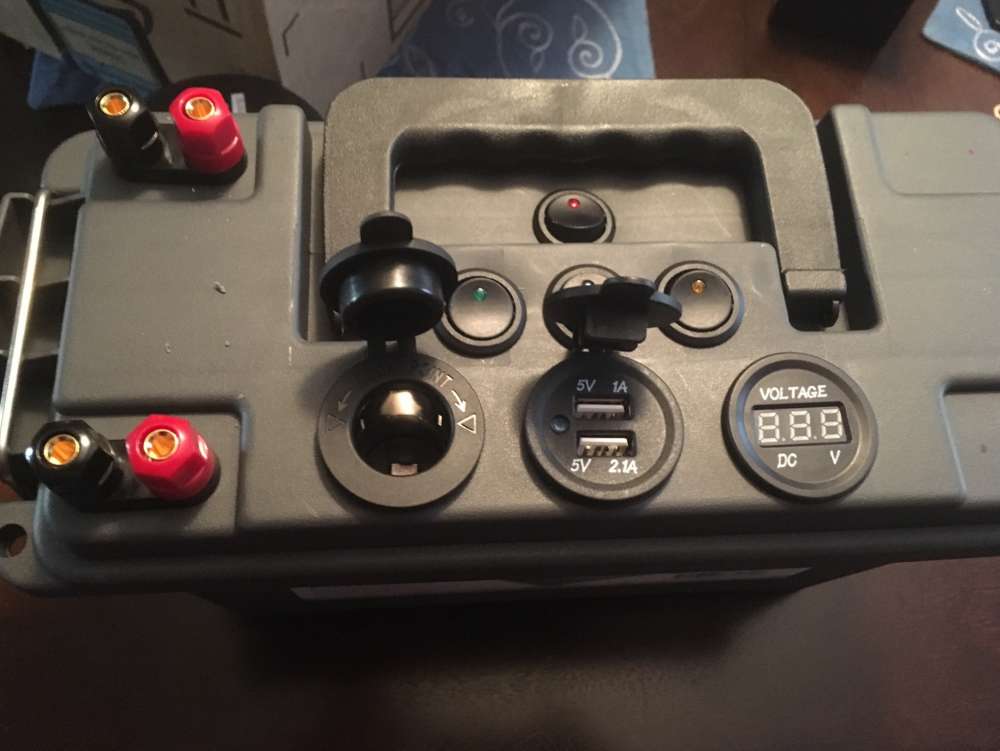
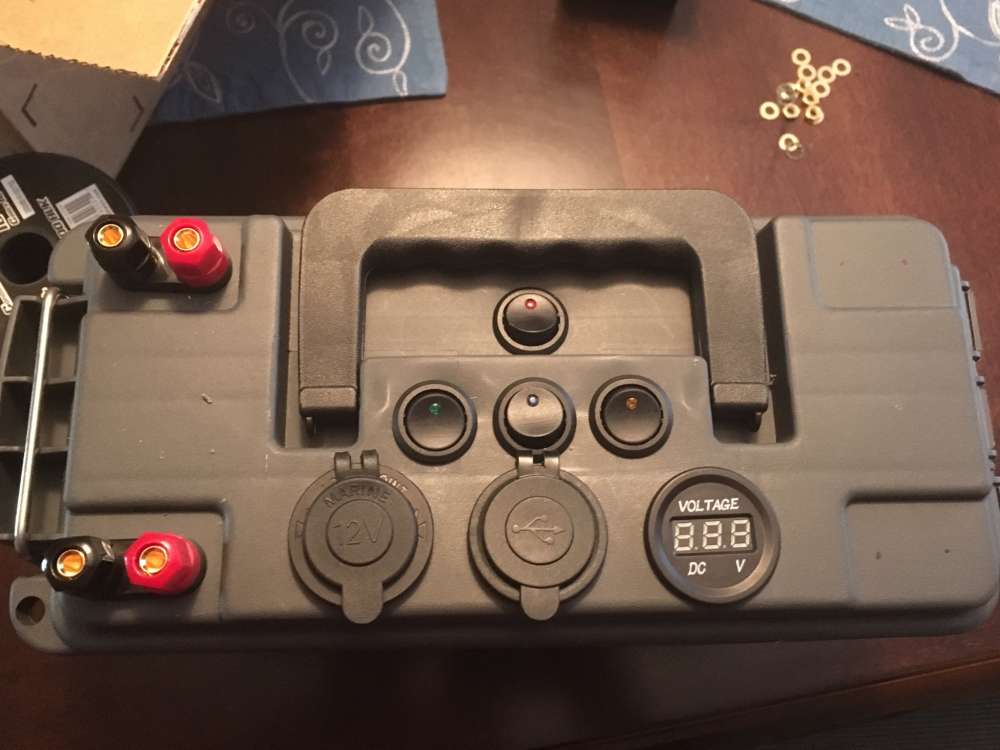
Finished up my battery box and set up my fishfinder on a cigarette plug. Plan on running my night lights on the power posts. Not waterproof but good enough for my needs. May also use it to run some aux lights on my bigger boat so I don’t have to wire them all up.
Pretty fun to build and learn about wiring. Can’t wait to make more for family as gifts.
Total cost was $40 but have sourced new parts and can get get it down to about $25 running inline fuses rather than a fuse block.


Wow, that's really clean. Nice!
Love it! Great work!
On 2/16/2018 at 1:16 AM, J Francho said:Wow, that's really clean. Nice!
On 2/16/2018 at 2:06 AM, Darren. said:Love it! Great work!
Thanks!
Nice job!
Any chance we can see the guts, and a parts list?
On 2/16/2018 at 9:36 PM, J Francho said:Any chance we can see the guts, and a parts list?
This! Would love to see the same.
I currently just stick my battery in a Sea to Summit dry bag. It's a weak solution, but works.
I'd love to do something like this.
On 2/16/2018 at 9:36 PM, J Francho said:Any chance we can see the guts, and a parts list?
Check out JDS outdoors on youtube for a video on how to make one. He also has a parts list linked. I probably watched the video 3 times. It was very theraputic.
I am out of town so I don’t have a pic of the fuse block but do for the rest of the wiring. Got the box at Harbor Freight for $4

Just finished my “under $25” box. It came out pretty good. Instead of a master switch that also turned on the volt meter I rigged up each switch to turn on the accessory as well as the volt meter. Cut down on needing a fuse block. Running inline fuses.
All the wiring, fuses, and most connectors were included with the port kit I got off Amazon. Total cost was ~$23.

Guts

On 2/16/2018 at 12:33 AM, Ringonu said:Finished up my battery box and set up my fishfinder on a cigarette plug. Plan on running my night lights on the power posts. Not waterproof but good enough for my needs. May also use it to run some aux lights on my bigger boat so I don’t have to wire them all up.
Pretty fun to build and learn about wiring. Can’t wait to make more for family as gifts.
Total cost was $40 but have sourced new parts and can get get it down to about $25 running inline fuses rather than a fuse block.


That's a very professional looking set up. Good job!
I now have a “test box”. This is my latest addition. I am not able to get to the spot where I want to mount lights on my boat so here’s my workaround. Should work for night fishing.

That's very impressive. I'd love to do something like that for mine but my electrician skills are about on par with Clark Griswold.
On 4/15/2018 at 1:26 PM, Bluebasser86 said:That's very impressive. I'd love to do something like that for mine but my electrician skills are about on par with Clark Griswold.
Youtube works wonders. I never wired up anything before these boxes. With what I learned i’m eventually going to clean up my boat wiring. It’s a mess.
Battery box v2.0 completed. This is definitely a one-off. Too much time and aggravation. The switches didn’t seat all that well so it’s not 100% waterproof. It could take a good downpour though.


On 4/28/2018 at 6:27 AM, Ringonu said:The switches didn’t seat all that well so it’s not 100% waterproof.
I used those same rocker switches on my jon's homebrew steering console. Home Depot has a surprisingly wide range of rubber O rings; you could probably find one to slip over the switch before inserting it into the hole, and crank it down.
Nice job on the DIY box.
This is a great thread! I actually had a Nocqua pro power kit on order that I cancelled because of this thread. Looked like it would be fun to build one of these instead. I just finished this one up last night. The JDS Outdoors video made it tremendously easier to work through.


That looks great!
Wow that looks great is that a Sealed ammo can and did you do and other Silicon caulking or anything like jw
Edited by Randy EdmundsMisspelled a word
On 2/16/2018 at 12:33 AM, Ringonu said:Finished up my battery box and set up my fishfinder on a cigarette plug. Plan on running my night lights on the power posts. Not waterproof but good enough for my needs. May also use it to run some aux lights on my bigger boat so I don’t have to wire them all up.
Pretty fun to build and learn about wiring. Can’t wait to make more for family as gifts.
Total cost was $40 but have sourced new parts and can get get it down to about $25 running inline fuses rather than a fuse block.


You did good! I built mine last year and with the case being the exception, used the same parts.


On 1/3/2019 at 11:41 PM, Harold Scoggins said:You did good! I built mine last year and with the case being the exception, used the same parts.


That looks great. What size Pelican case did you use? Are the switches siliconed in place for waterproofing?
I'm looking to undertake a build myself. I'm thinking of using some push button switches that I've found on eBay.
On 1/25/2019 at 7:42 AM, hisjr said:What size Pelican case did you use? Are the switches siliconed in place for waterproofing?
It's a Pelican 1400 and I used Lexel around the gauges and switches.
On 1/25/2019 at 8:43 AM, Harold Scoggins said:It's a Pelican 1400 and I used Lexel around the gauges and switches.
I found a deal for a couple Pelican 1400s yesterday and I wasn't sure if it would work. Thanks for the reply. I think everything will work.
On 1/3/2019 at 11:41 PM, Harold Scoggins said:

What is this plug? Are the binder posts the same as speaker binder posts?
On 1/26/2019 at 12:27 AM, hisjr said:What is this plug? Are the binder posts the same as speaker binder posts?
I think I found it. Is it the SAE plug?

On 1/26/2019 at 12:27 AM, hisjr said:Is it the SAE plug?
That looks like it. I got mine from a RV dealership. These are the posts I used: HIGHROCK 10pcs Terminal Binding Post Power Amplifier Dual Copper 2-Way Banana Plug Jack (from Amazon)
On 1/26/2019 at 4:16 AM, Harold Scoggins said:That looks like it. I got mine from a RV dealership. These are the posts I used: HIGHROCK 10pcs Terminal Binding Post Power Amplifier Dual Copper 2-Way Banana Plug Jack (from Amazon)
I found some waterproof locking (maintaining) led switches on eBay that look great. The Pelican 1400 looks perfect too. Thanks for your help.
On 1/3/2019 at 5:44 AM, Randy Edmunds said:Wow that looks great is that a Sealed ammo can and did you do and other Silicon caulking or anything like jw
I switched over to plano ammo cans which are sealed but I didn’t add any additional silicone. The pelican knockoff i did use silicone on to fill in gaps due to the plastic being too thick and the buttons not seating fully.
I use these more around the house than I do on the kayak. Sometimes an iphone charger is too far from where i’m sitting.
related Marine Electronics topic
next topic
most viewed Marine Electronics topic
© 2025 - fishing.qciss.net. All Rights Reserved.